
Google Calendar 2019 Tutorial
Say goodbye to your pens and paper. No more forgetting doctor’s appointments, work meetings, family dinners, or special events. You no longer have to remind yourself, Google Calendar is here do that for you.
So, you’ve just opened your Google Calendar for the first time and there are so many features Google calendar offers that it can be hard to know where to start. And that’s what this article is for: to take you through the set-up process and showing you the unique features Google Calendar has to offer you.
What are we waiting for? Let’s start.
Just The Beginning
If you already have a Google account, you’re already one step ahead! Your Google Calendar will already be linked to your account ready for use whether it’s on your browser or mobile device.
If you don’t have a Google account, no worries, all you need to do is take a couple of seconds to register, and then you’ll be ready to begin.
Import Your Calendar: Online
Even if you have been using a different calendar application, don’t fret, Google has already created an option for you to easily transfer all your data from your calendar app straight to Google Calendar. But, you will need to import your calendar data from a computer, not any mobile device.
First, make sure you have your original calendar open on your computer. This is where you are going to Export your calendar data and save it on your computer.
Here’s a fun fact: calendar data can take on different types of formats. So, you will need to choose the format you are going to export your data.
CSV is going to work best for Google Calendar. But if you’re original calendar is from an Apple Calendar, choose vCard. Don’t forget to remember where you saved your data! This will be important for you when you are importing that data.
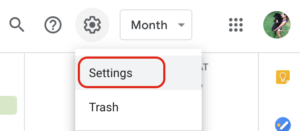
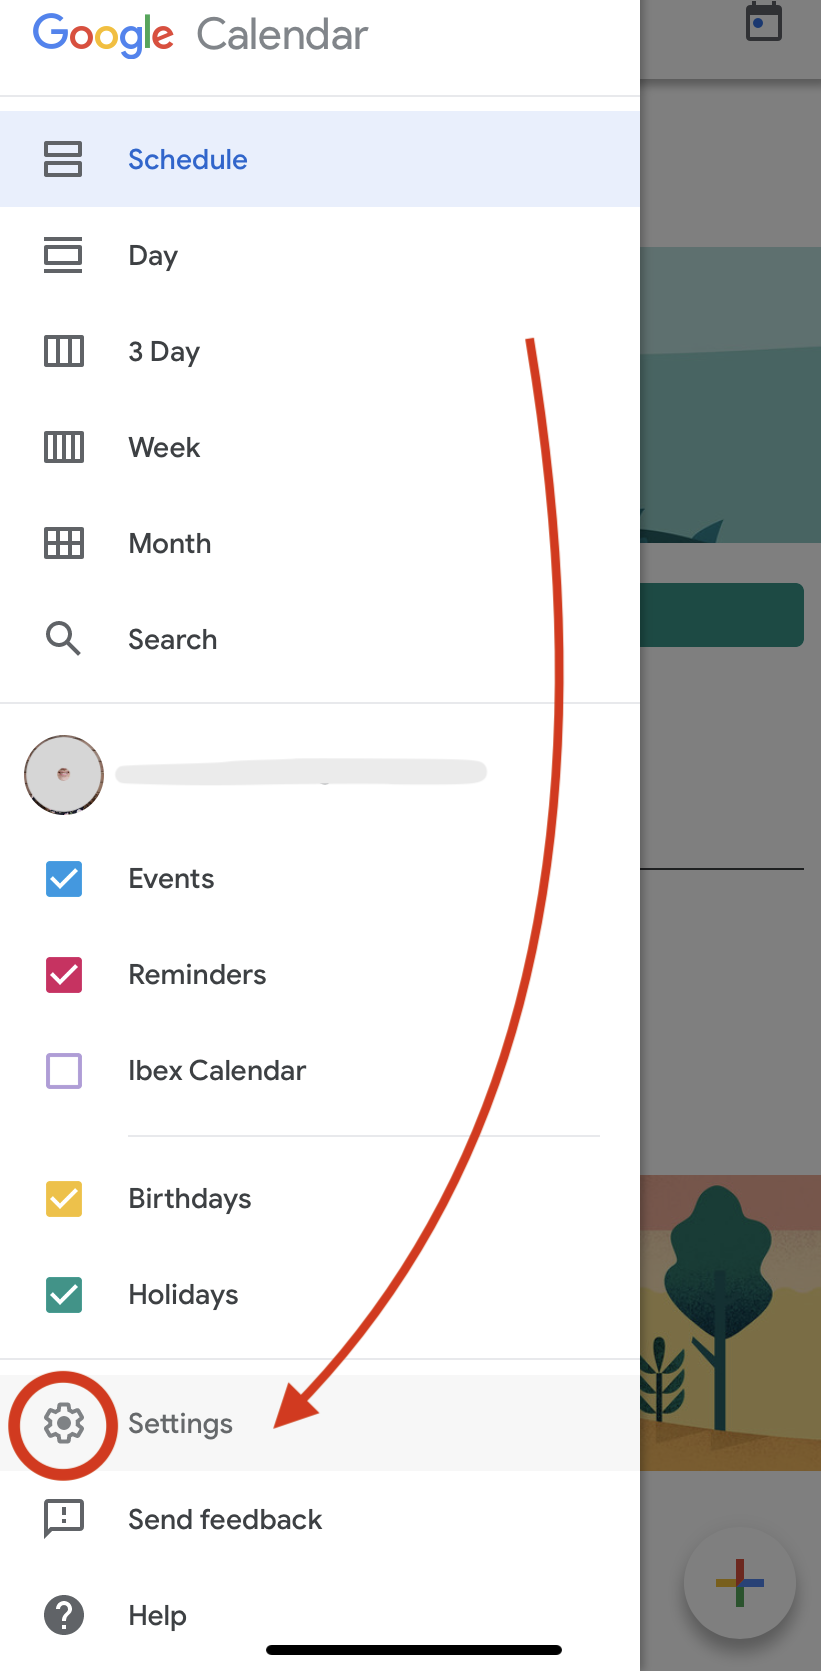
Here comes the fun part. Head to your Google Calendar where you will see the settings icon at the top right-hand corner of your screen.

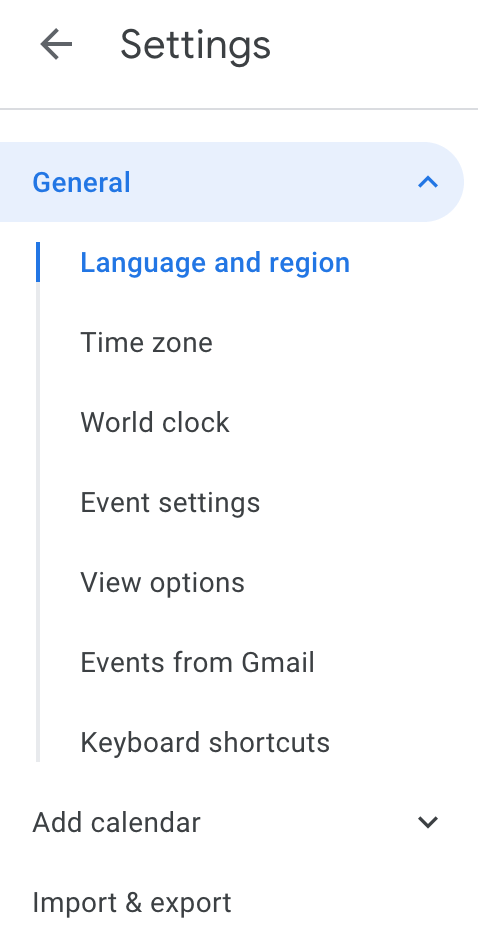
See that icon? That’s your new best friend. Say, Hello! Click on that icon and it will give you a drop-down menu, hit settings.
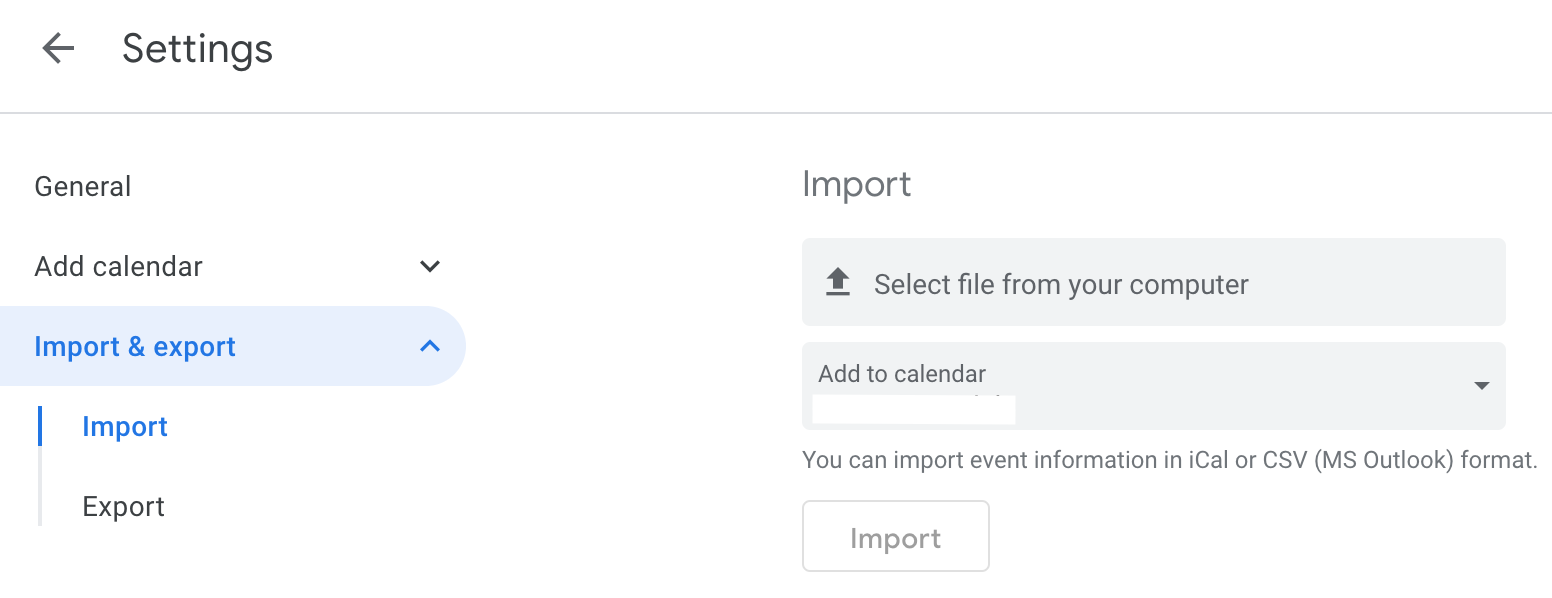
In the general settings, you will see the Import & export menu selection. Here is where you will import your calendar data and Abracadabra! Everything from your original calendar will now be in your Google Calendar, just like that.
Of course, we know some things don’t always go as planned so if something doesn’t work during the process of going from an Apple Calendar to Google Calendar, we have a Plan B.
Plan B: You’ll need to use one of your iOS devices where you’re going to change your default calendar to your Google account.
- Go to Settings > Passwords & Accounts
- Add your Google Account if you haven’t already
- Press Next
- Enter your password > press next
Once you’re logged in and your Google Account is ready…
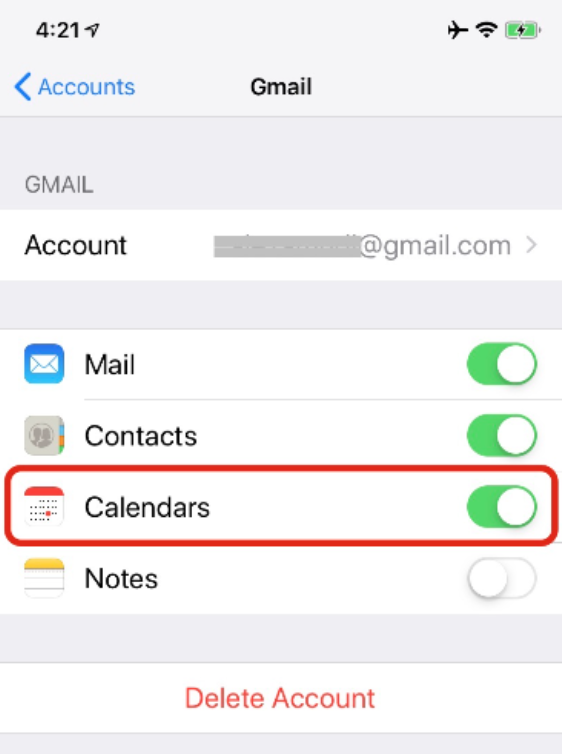
- Open Settings > Passwords & Accounts
- Scroll down to find your Google Account
- Switch the toggle for Calendar to on
Now that you have all your data in your new Google Calendar, let’s show you what Google Calendar is really capable of.
Not Your Ordinary Calendar
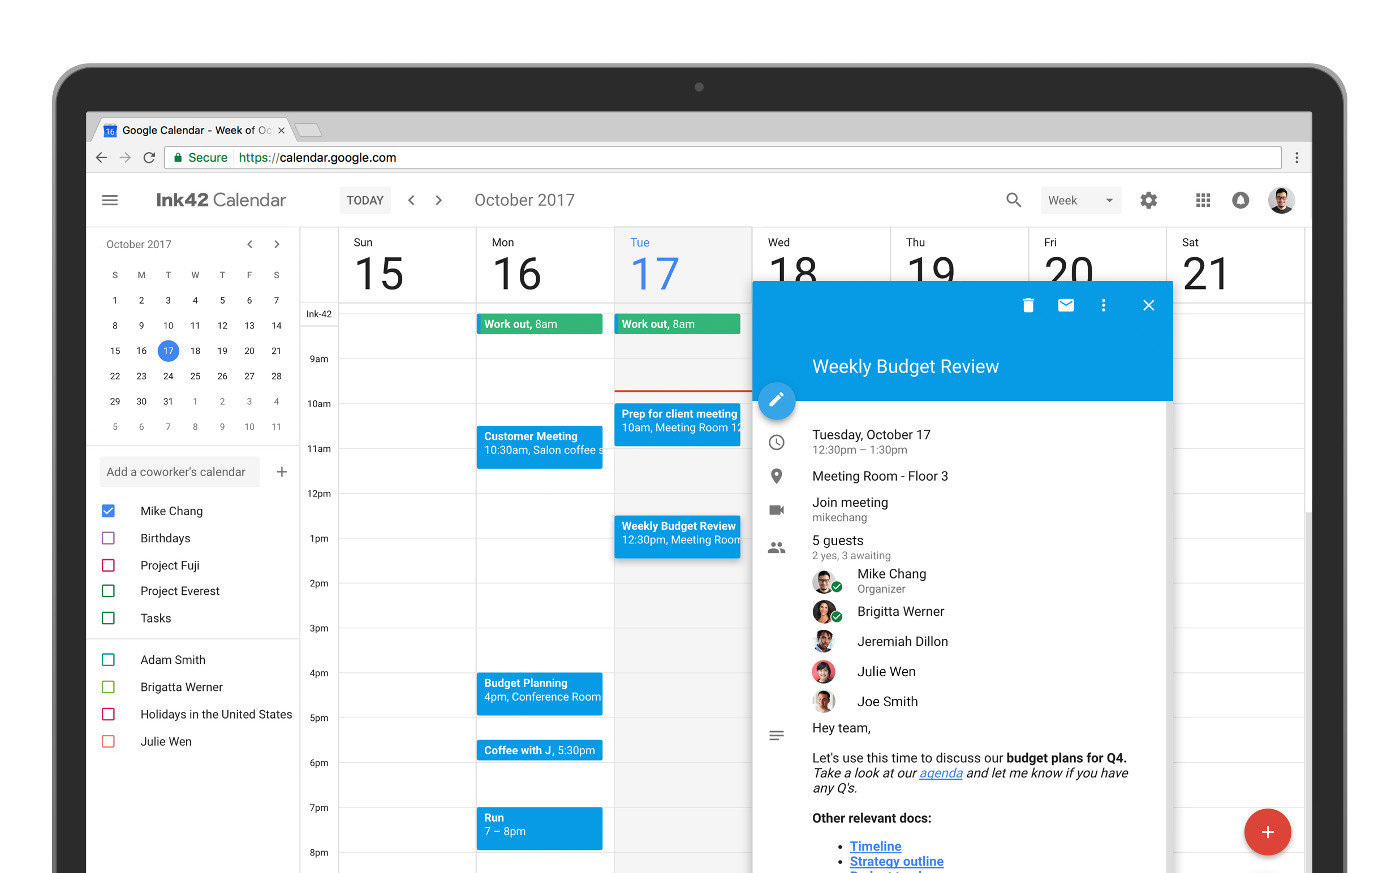
So, let’s figure out what your new best friend can really do. Now, you should recognize this screen from before if you imported your calendar data.
Look at all that stuff! You can customize Google Calendar as you wish, anytime you want and on any mobile device or computer. So, let’s go through the different settings functions that you can access on your computer.
Language And Region
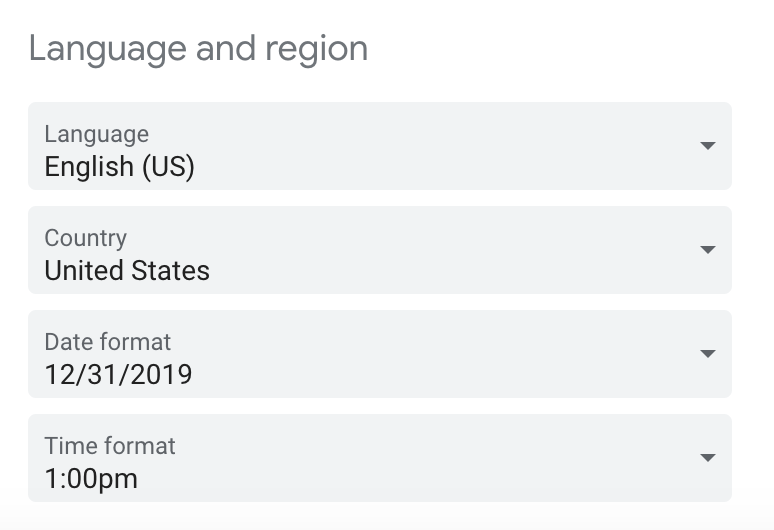
Here is where you will be able to choose the language of your choice, country, the date format, and time format. Google automatically sets all of this for you based on the information it gathers from your internet connection and current location, but of course, you can change this at your disposal.
Time Zone
Google will automatically default to your local time. How nice!
So, you can easily create an event and it will be customized to your local time. Go ahead and invite someone to your event and it will show up under their local time so there is no confusion.
Even when you travel, Google should always be adjusting to your local time zone based on your IP address or telephone data.
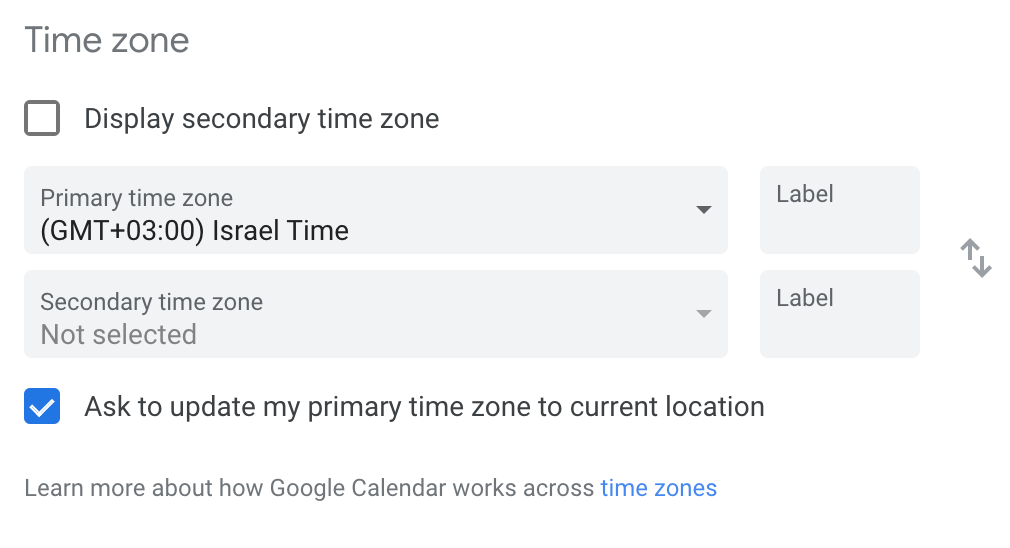
But what if it’s not responding? Don’t you worry. You can always head to the Time Zone settings and change the time to be exactly where you are. But, it doesn’t stop there.
What if you’re traveling and you want to see what time it is at home? Display secondary time zone is your tool for that!
Check the box next to it, click on the secondary time zone drop-down menu and select your time zone of choice.
If you don’t want Google always updating your time zone based on your location, all you have to do is uncheck the option to update your primary time zone. This will keep your schedule fixed to one time zone regardless of where you are.
World Clock
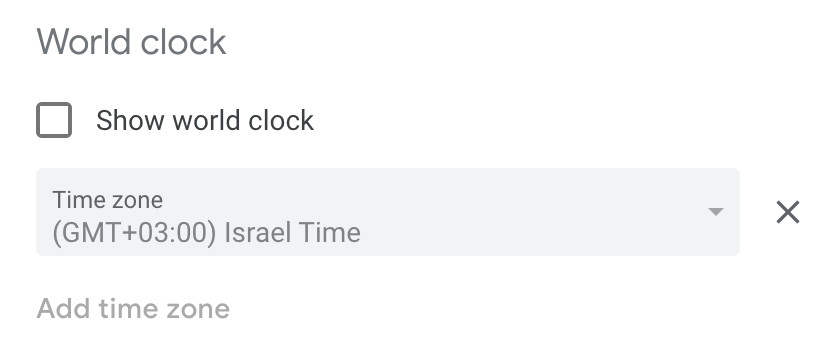
Get connected throughout the globe with the World Clock feature, which is only available for your computer. This lets you add any time zone you want in any part of the world. Woah, right?
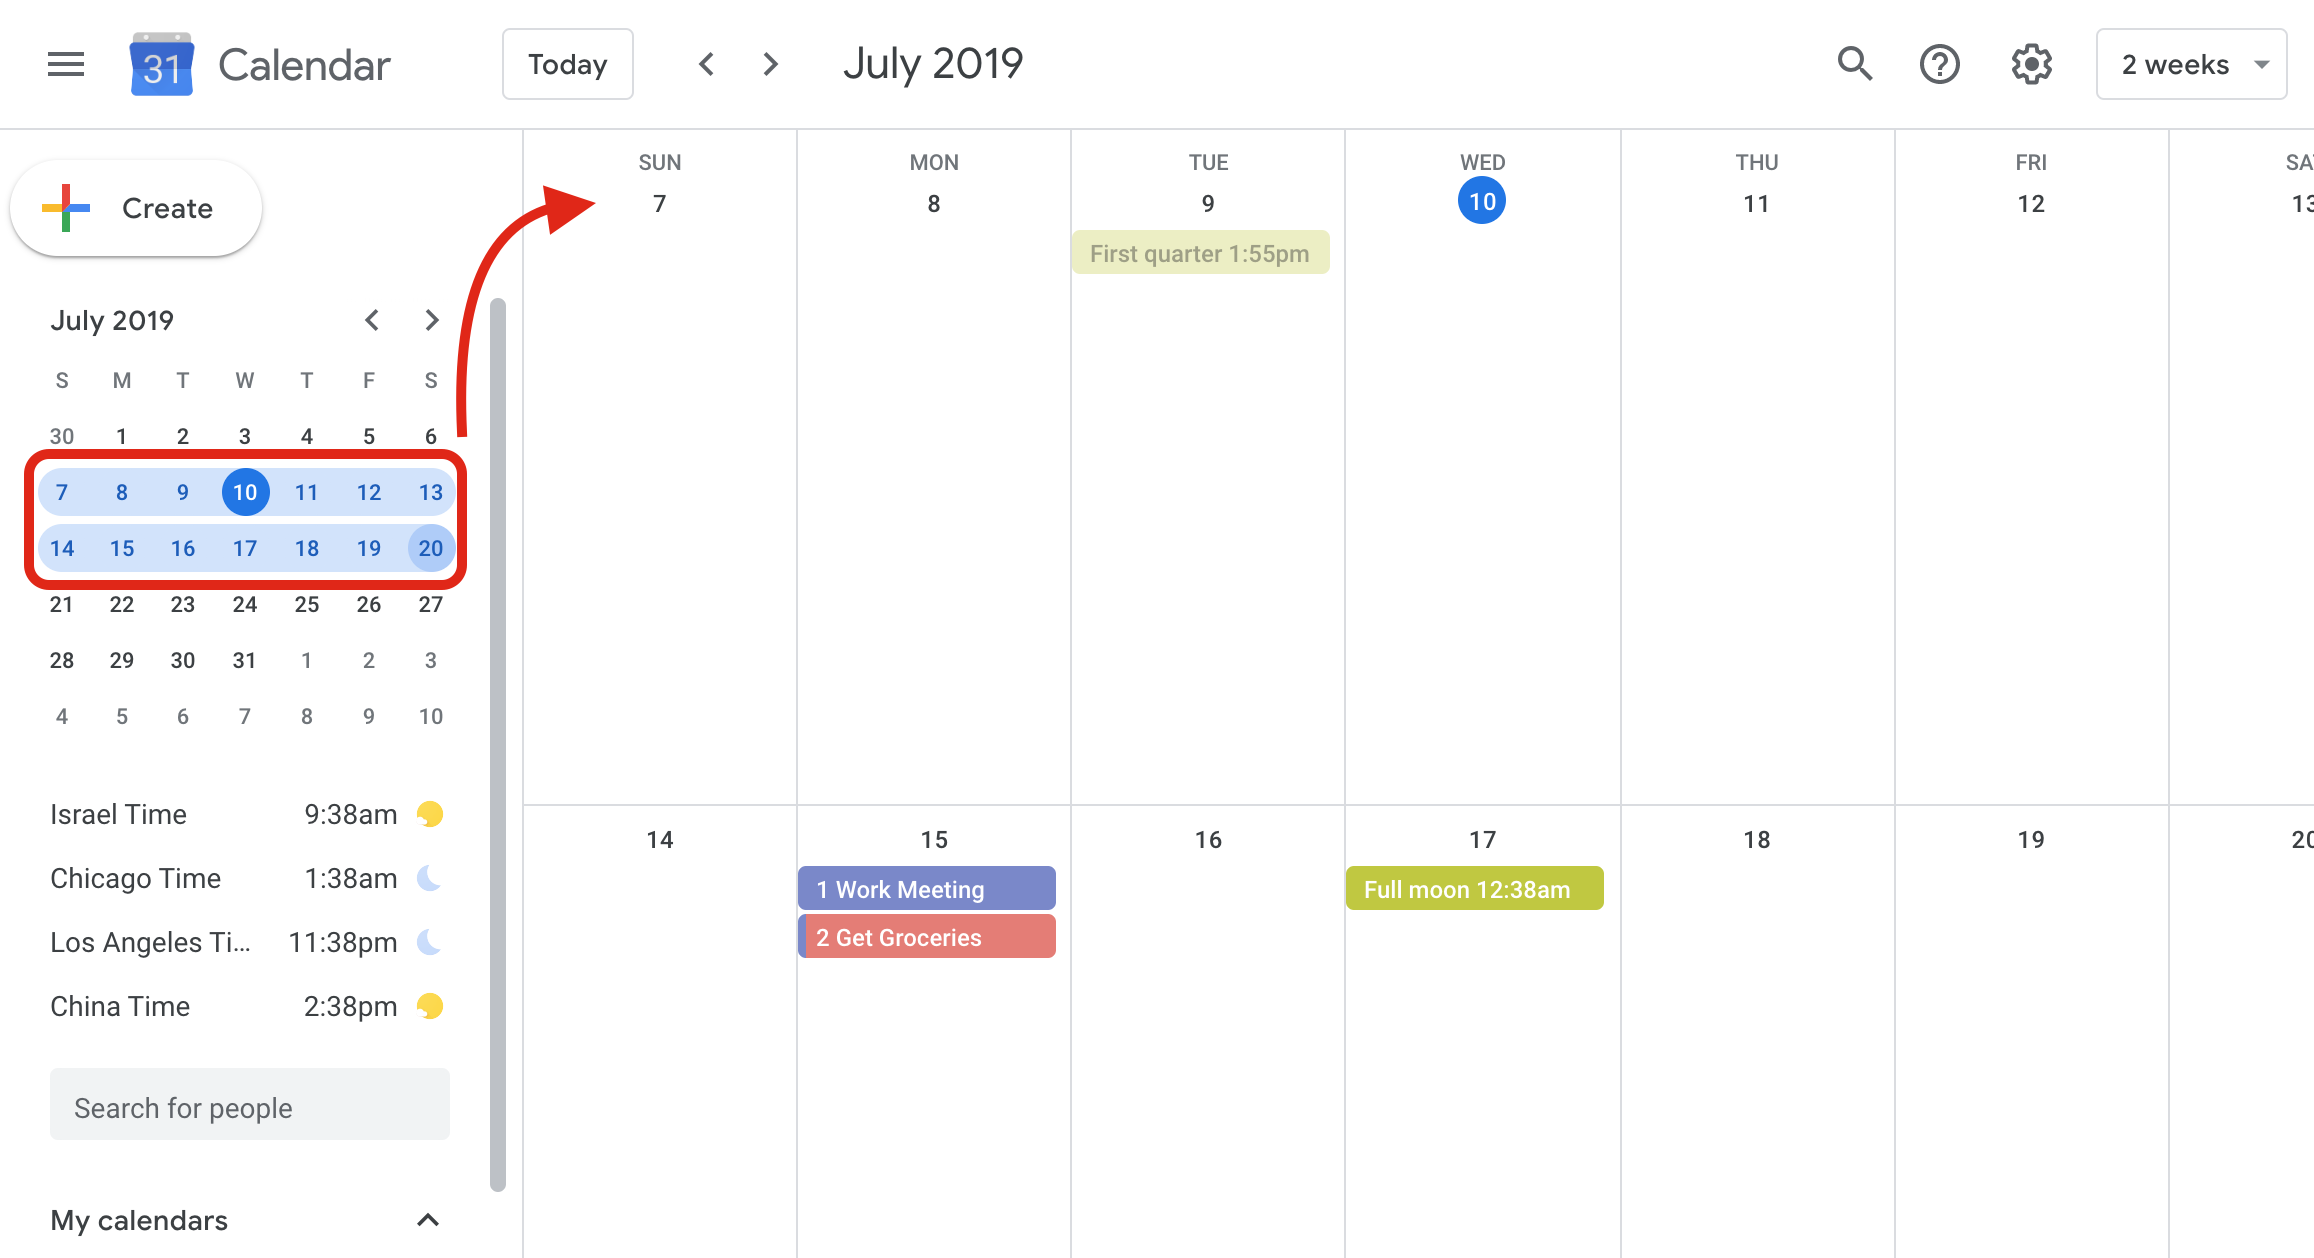
Check the Show world clock box and you can add the locations you want. The various time zones will show up on the left-hand side of your screen below your month view. It will look a little something like this:
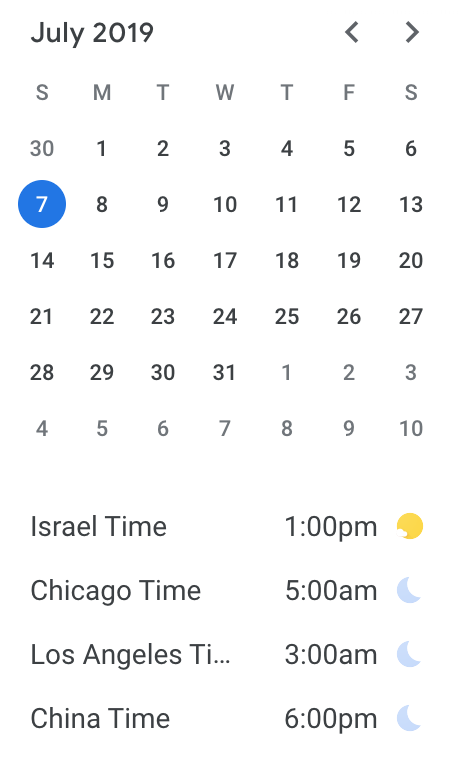
Looks nice, doesn’t it?
Event Settings
Your event settings are important! Make sure to take a look at these so you can customize your schedule to the perfect fit.

The first component of event settings is the default duration. The default duration is the amount of time that will automatically set for events you create. Your default duration options include 15, 20, 30, 45, 60, 90 and 120 minutes.
The second part of event settings is something that’s important for everyone: meetings. Have you ever been running late to back-to-back meetings? Well, you don’t need to anymore with the speedy meetings feature that is located right under the default duration.
Speedy meetings will automatically end your meetings 5-10 minutes early so you have enough time to make it to your next meeting, without any rush.
Default guest permissions is a function that lets you choose what other people invited to an event can do.
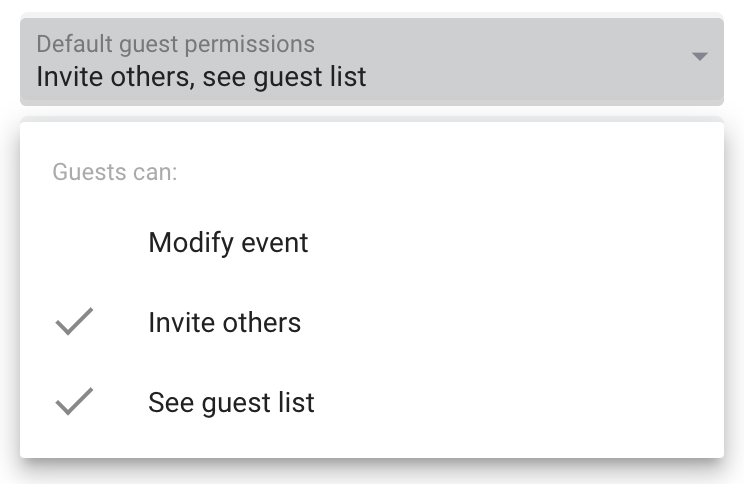
You have three options:
- Guests can modify the event, meaning they can change the time, location or duration of the meeting.
- The second option is to allow people to invite others to the event
- Your third option is to let people see the guest list for that event.
Make sure you remember what permissions you are giving to those invited to your event. For some events, maybe you don’t want everyone to be able to see who is going. On the other hand, maybe you want someone to have the ability to change the time or location of a meeting if you are unavailable to change it.
Automatically Add Invitations is the fourth feature for event settings. This is how you are going to decide how you’ll see your invitations. Again, you have three options:
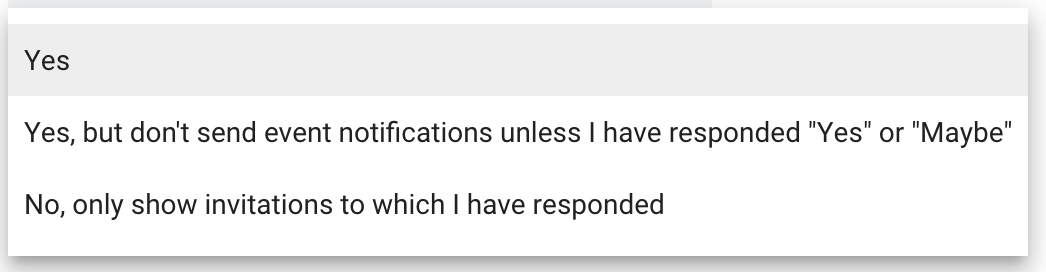
- You can decide to add all invitations to your calendar
- Add all invites to your calendar but only get notified to the ones you’ve accepted
- Only see the events you’ve accepted
This tool is pretty useful if you need to clean up some space in your calendar and you can always change it up!
On to Notifications! How do you want to be notified about your events?
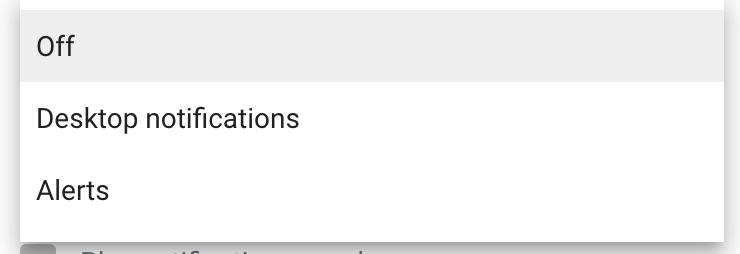
You can shut them off entirely if you’d like. You can also restrict your notifications to just desktop notifications, or you can go all the way and choose alerts that we promise will always alert you, literally.
Let’s note that if you have alerts on, this change in settings will connect to your mobile device(s). Not only will it alert you, but it will for sure wake you up!
Okay, one last feature. So, you can choose to automatically add video calls to events you create through Google Hangouts. It looks like this:

Normally, we suggest leaving this box unchecked otherwise you’re going to have a video call created for every…single…event. And that could get a bit crammed.
View Options
You ask, “What are view options?” Well, the answer is a bit complicated: options for viewing your calendar.
Remember your new best friend, the settings icon? Go there to change up how your calendar looks.
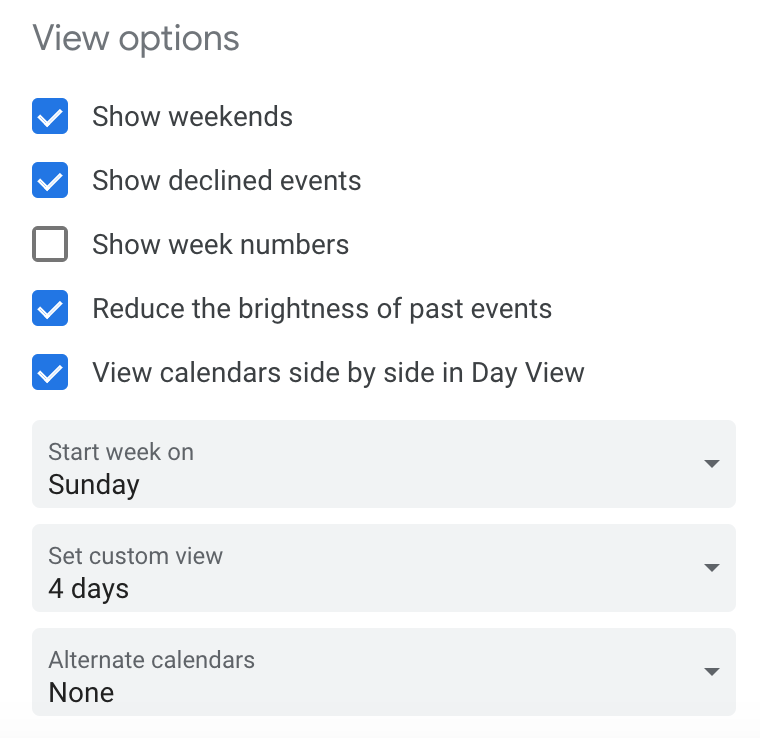
From here you can check any of these boxes and it will adjust to the look of your calendar instantly. Just to clarify, week numbers will place a number next to each week in the year if you turn them on.
Some of the other options you have are to adjust what day your week starts, the number of days you can see in each view and, get this, you can add different calendars from around the world!
Events From Gmail
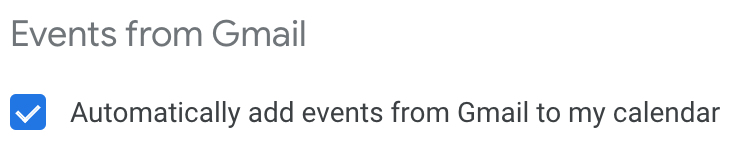
And just when you thought it couldn’t get any easier, Google decided to be extra cool and has the ability to detect events directly from your inbox. Time-saver alert!
Now, you won’t even be able to even forget to add things to your calendar. Why would you even uncheck that box?
Keyboard Shortcuts
Keyboard shortcuts? Say no more.
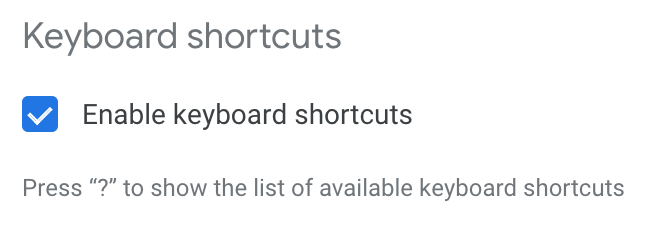
Press K or P: move back through the year. Press J or N and you’ll move forward through the year. Press T and you’ll see the current view of the year. Press / and you’ll bring up the search function.
Shortcut away!
Now that we’ve gone through all the fun tricks you can do on your computer, let’s go on to what you can do on your phone. You’ll always have your calendar with you as long as you have your phone on you, so let us tell you how to use it!
Google Calendar for iPhone & Android
So, your best friend, the settings icon, has now moved to the bottom left-hand side of your screen.
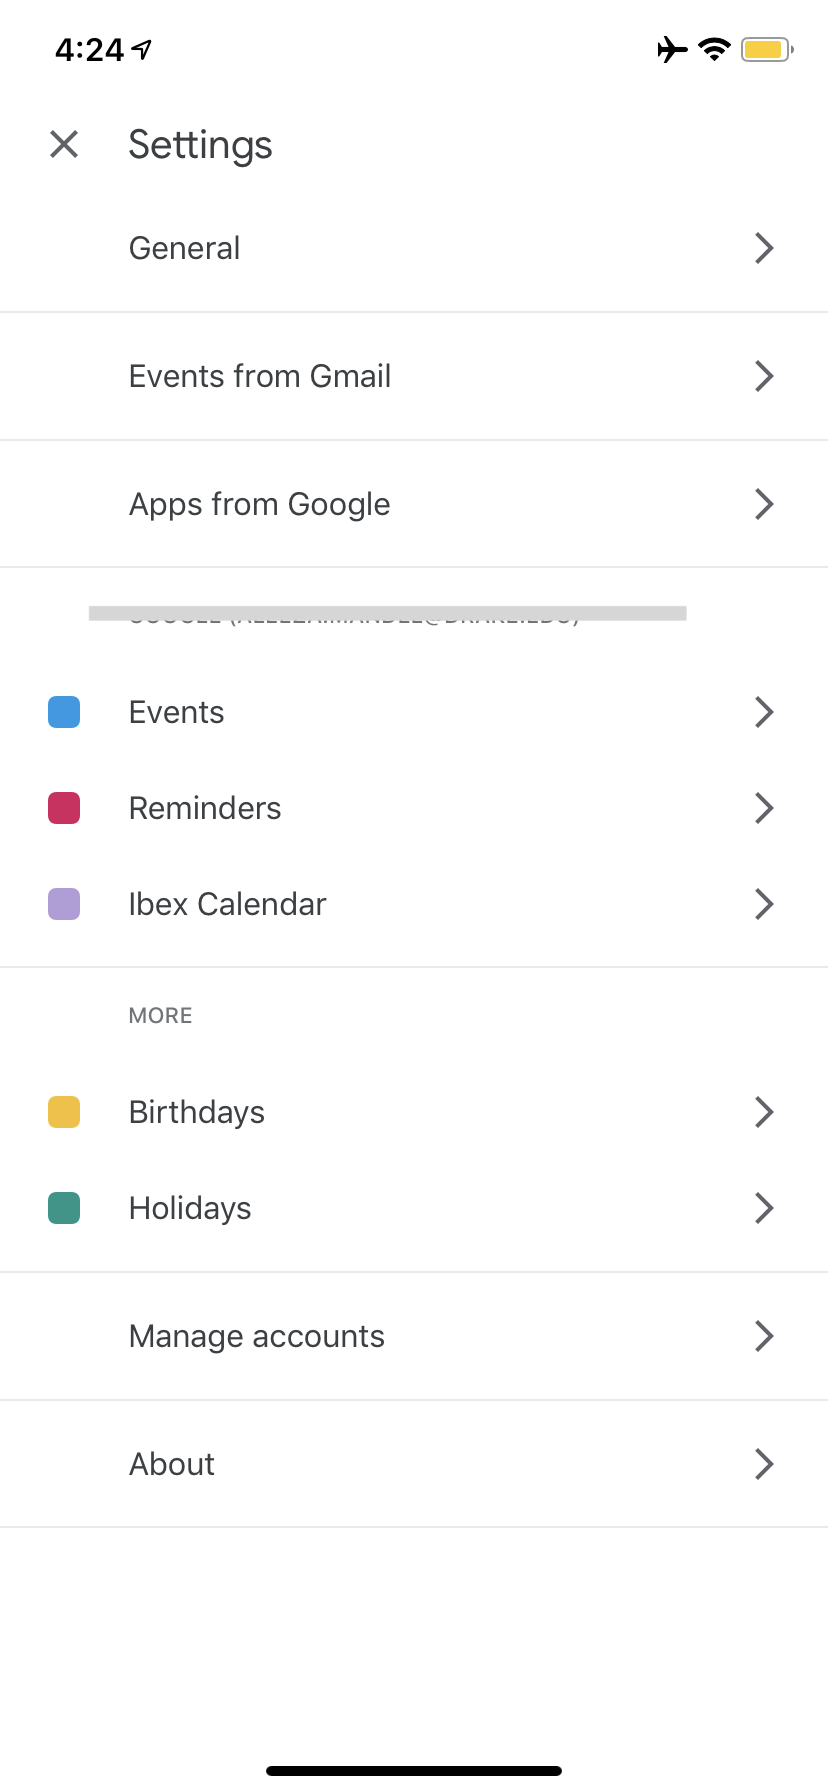
When you click on that icon, it will bring you to your settings that will look a little something like this:
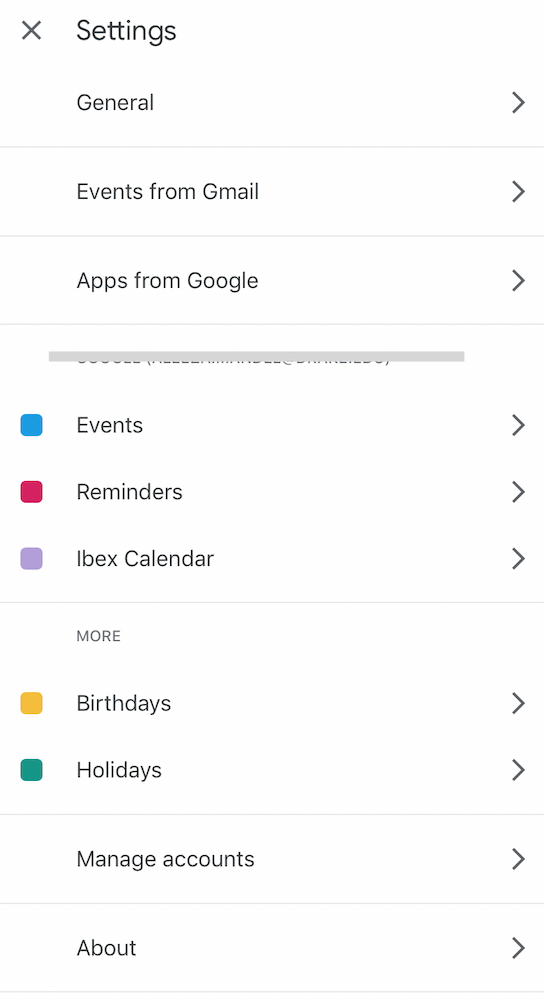
You have your general settings and underneath you will find Events from Gmail, which we talked about before. If you want your Gmail to automatically add events from your Gmail, just turn the switch on.
Once you click on General it will show you all you can edit, just like the Google Calendar online. Here you have a lot, but not all, of the functions that you can do on the online calendar as well.
You will also see Events and Reminders listed below the settings. The Events section will allow you to adjust notifications and color tags. Clicking on Reminders will give you the option to change the color tag as well. Note that you can only create reminders on your phone, not your computer, but you can still see them on your desktop.
Quick Response
Specifically for Androids, there is a feature called Quick Responses. This lets you choose an automated message if something comes up, handy, right?
Just click on one of the responses and you can edit it however you like. You can also tap the event you want to have a response for and choose the people already invited who will receive the message.
More
The More section of the settings is where you can edit Birthdays, which as we all know are super important to remember! You can change up the color tag and also switch the settings to Contacts so you can keep your calendar personal.
Congrats! Now you know how to work Google Calendar on your desktop and on your phone. But, there’s more. Who says you need just one calendar?
Multiple Calendars
Google actually lets you view multiple calendars at once. However, don’t get confused. This function doesn’t actually add an entirely new calendar, it simply takes the data from another calendar and places it in yours.
Adding Other Calendars
Remember, you can only do this on your computer and you can add a friend’s calendar in two different places.
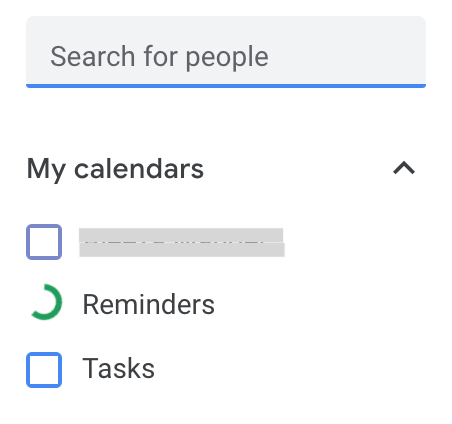
One way to look, not add, at another calendar is located on the left-hand side of your screen where it will say My Calendars. Above that, there will be a search bar that says, “Search for people.” This function lets you type in people’s names and will show a preview of their calendar along with yours.
To actually add another person’s calendar to yours, head to Other Calendars, right below My Calendars.
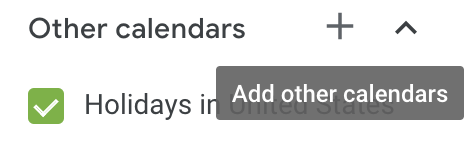
Click on that plus button and it will give you the option to “Add other calendars” in multiple ways. Once, you click the plus button, your options will show up and look like this:
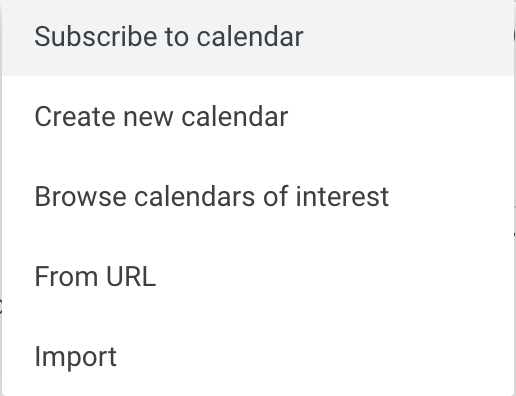
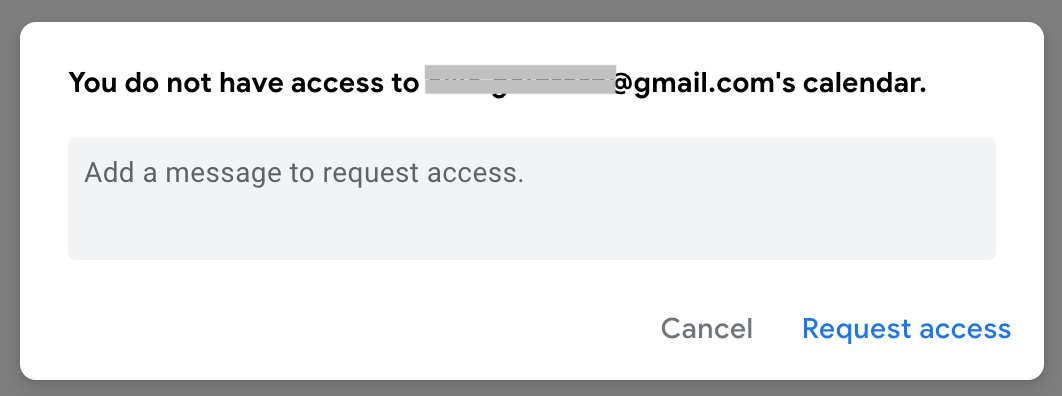
Look at all those options! Here you can click on Subscribe to Calendar and add one of your friend’s calendars by just typing in their name. If their calendar isn’t public, just type in their email address and you can Request Access to their calendar.
Creating New Calendars
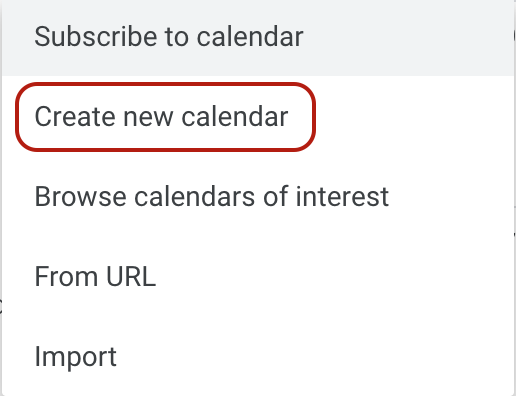
Want to create a new calendar of your own? We thought you’d never ask. Hit that plus button on Other Calendars again and this time, select Create New Calendar.
You can make this calendar separate from your work calendar so you can have something more personal and private. Your colleagues will probably want to know meeting schedules, but not your dental appointments, which is why this feature is useful.
Once you create it, you can name it whatever you like, share it with specific people or simply just keep it to yourself.
Calendars Of Interest
This is where it starts to get fun. You can easily look at calendars that you’re interested in and add them to your calendar by simply clicking that plus button once again where this will pop up:
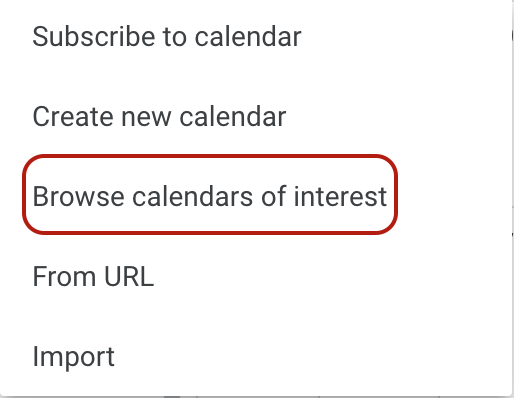
Hit the Browse calendars of interest option and it will take you directly to a page that looks like this:
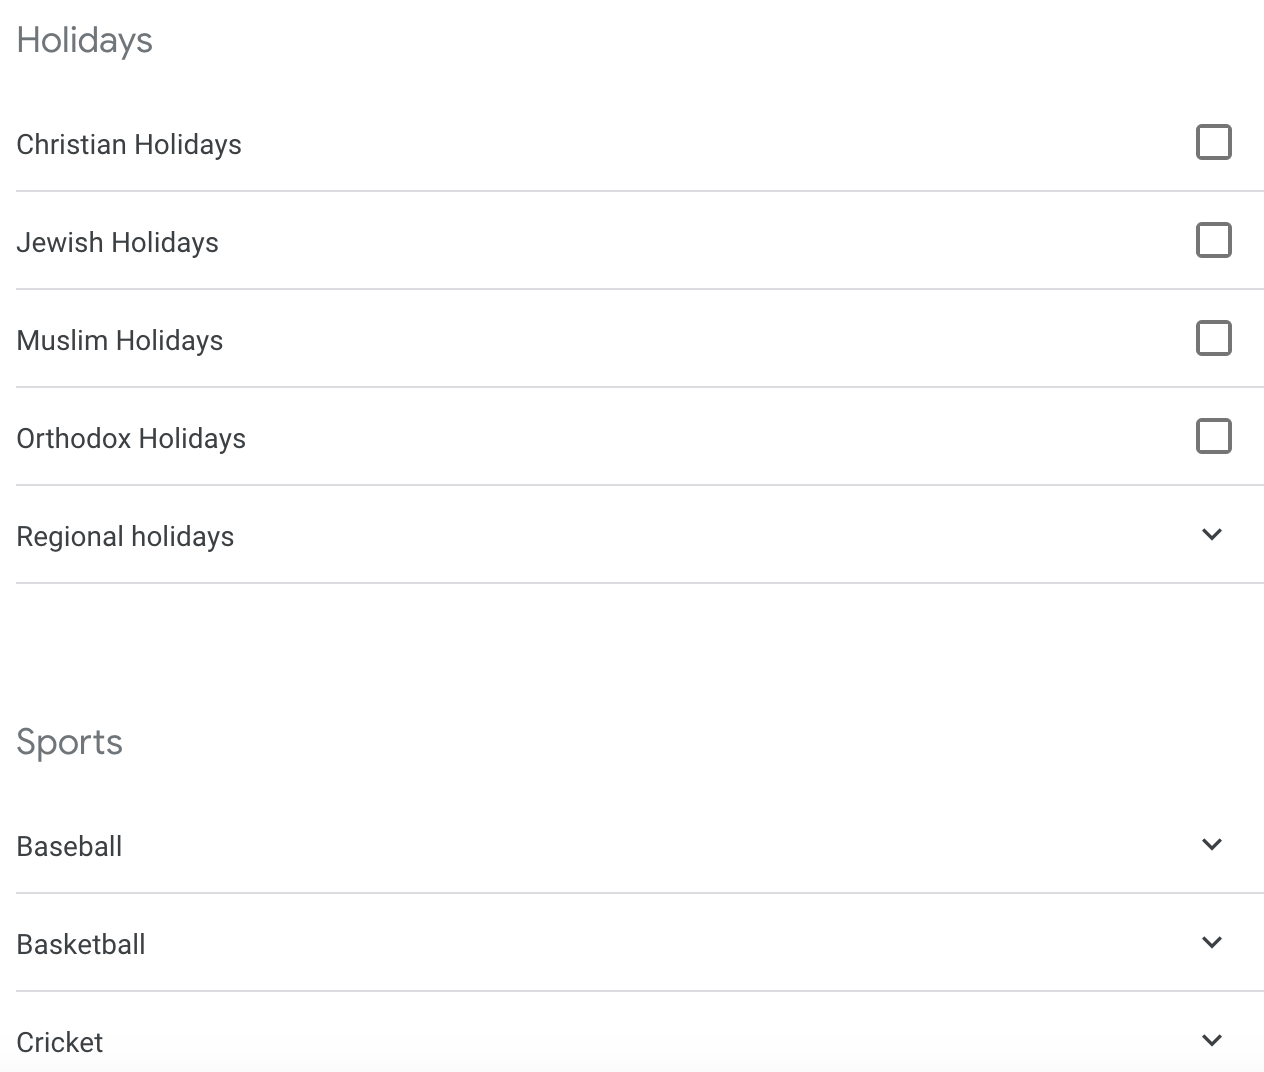
From here you can search for calendars you might want to add and Google has already organized them for you. This is a simple way to personalize your calendar. Thank you, Google!
Adding Calendars by URL
Your next option to add calendars simply by copying and pasting the URL for the calendar you want by looking around on the internet. You will click on the From URL option from the plus button next to the calendar or in the settings and it will take you to this prompt:
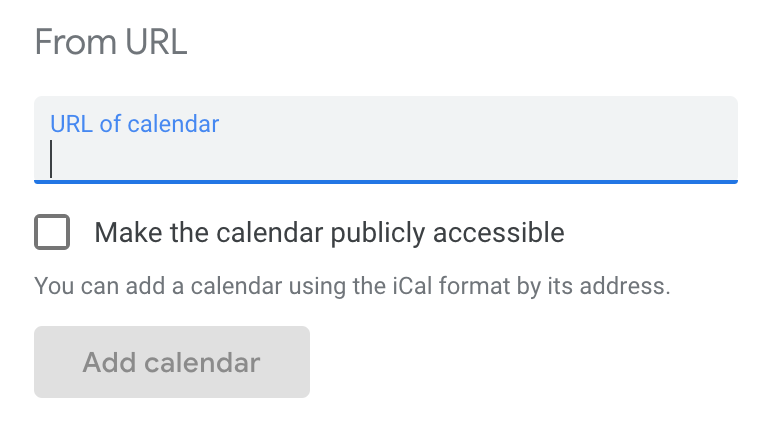
Now, you need to make sure that these calendars are in iCal format. A useful resource to find calendars that fit this format is by going to iCalShare, where it will offer you tons of calendars you probably didn’t even know existed.
You have the option to make the calendar publicly accessible, but if you’re already taking the calendar from a public source you won’t need to.
Sharing Calendar
Just as you are able to see other calendars from your friends, you’re able to share yours with them, too! Keep in mind, this function can only be done on your computer.
First, click on the ellipse (three dots) next to the calendar you wish to share and it will give you options that include Display this only, which only shows your calendar, and Settings and sharing, which lets you choose the color.
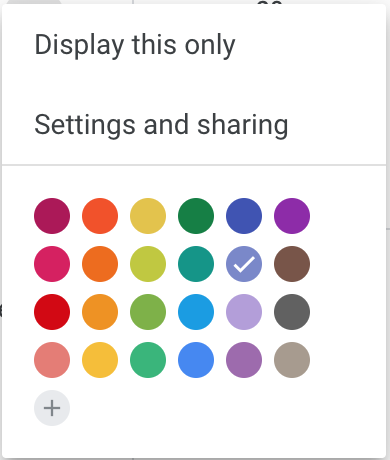
When you click on Settings and sharing, it will take you to the same page with all of the settings we talked about earlier and will give you two options to share your calendar with others.
The first way to share with your friends is to simply make your calendar public, letting everyone else see your calendar. Note: your calendar will show up in Google Search results! So, you won’t really have any privacy with this feature since it will be entirely open to the world.
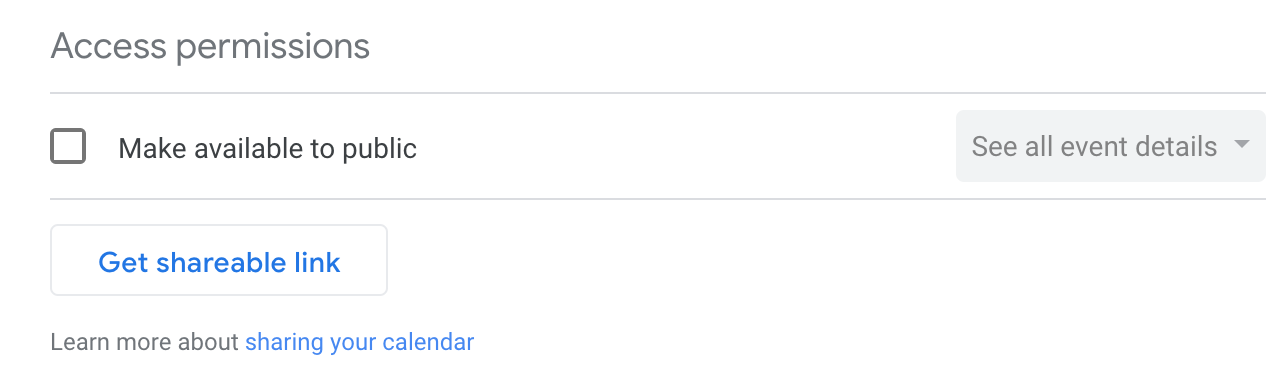
This option lets you get a shareable link that you can send to your friends to easily access. But, if you don’t click the box Make available to public, the URL won’t work.
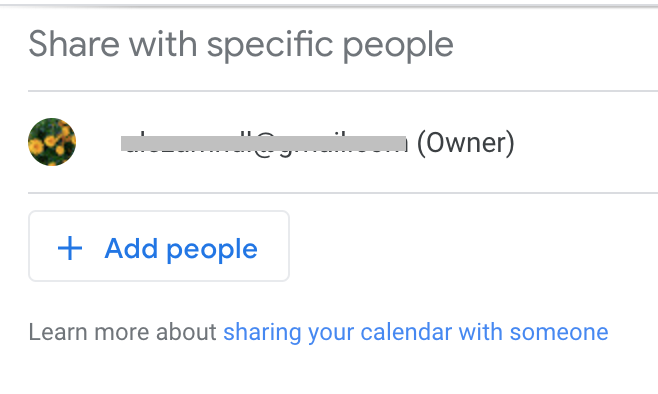
The second method for sharing is if you click on Share with specific people. Here all you need to do is type in their email and then that person gain access to your calendar.
Group Sharing
Google lets you share calendars with groups! Who knew?
So, there are a few ways to do this. The easiest way is to make a new calendar, which we went over before, and then click share with specific people to add your group members. Easy!
Group Sharing Issues
If you want to make a larger group calendar and you want to do more than just share a calendar, then it’s best to create a Google Group, which can be done at groups.google.com.
Go there, hit the big red box that says, “Create Group.” You can’t miss it! It will take you to a page that looks like this where you will fill out all the information needed to make your group.
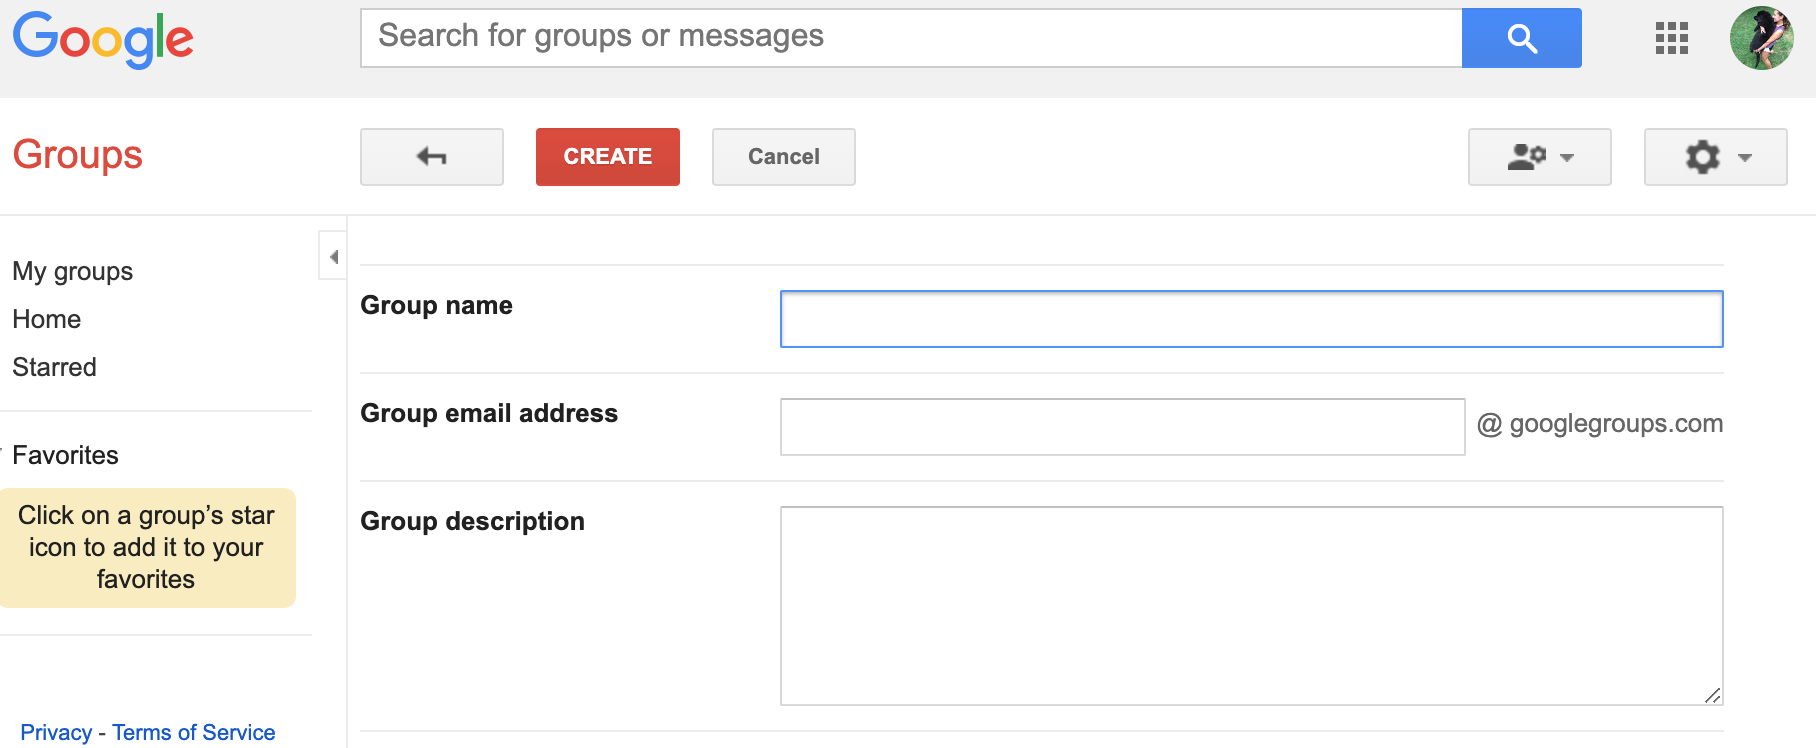
After filling everything out, your entire group will be given one email address that will look like “[name]@google.groups.com. This makes it super easy for you share calendars for that group so you don’t have to email every…single…person. Plus, everyone has access to the calendar!
Prioritize your events
Sometimes, things can get finicky on Google Calendar, especially when you want to prioritize things throughout the day. So, here are some options to work your way around that.
Normally, Google will prioritize events in chronological order. It doesn’t matter which schedule they appear on. For example, if you have a work meeting at 8:00am and a haircut at 5:00pm, your meeting will be shown at the top, simple, right?
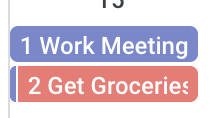
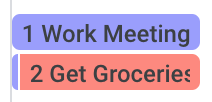
Here’s the catch: if you have more than one all-day event, Google doesn’t know which one should be prioritized first so it reverts back to listing them in alphabetical order. So, no matter how important something is, you’ll see what comes first in the alphabet.
What’s more important, getting groceries or making it your work meeting?
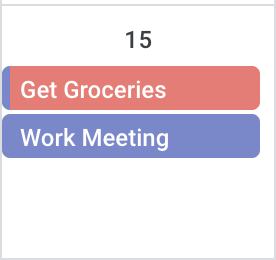
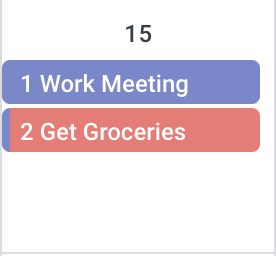
Well, Google doesn’t know. So, here’s a trick to list them in the order you want: put a number before each of the event titles. Sure, it can be a small hassle, but it works.
Now, let’s edit your calendar.
Time To Edit Events
Adding Events From Your Computer
Guess what? You can add events from both your computer and your phone!
On your computer, you can do this in two ways. One is to hit that plus icon at the bottom right-hand side of the page where you will see the full event creation form. On the other hand, just click on the day you want to create an event and the Mini-Event form will pop up.
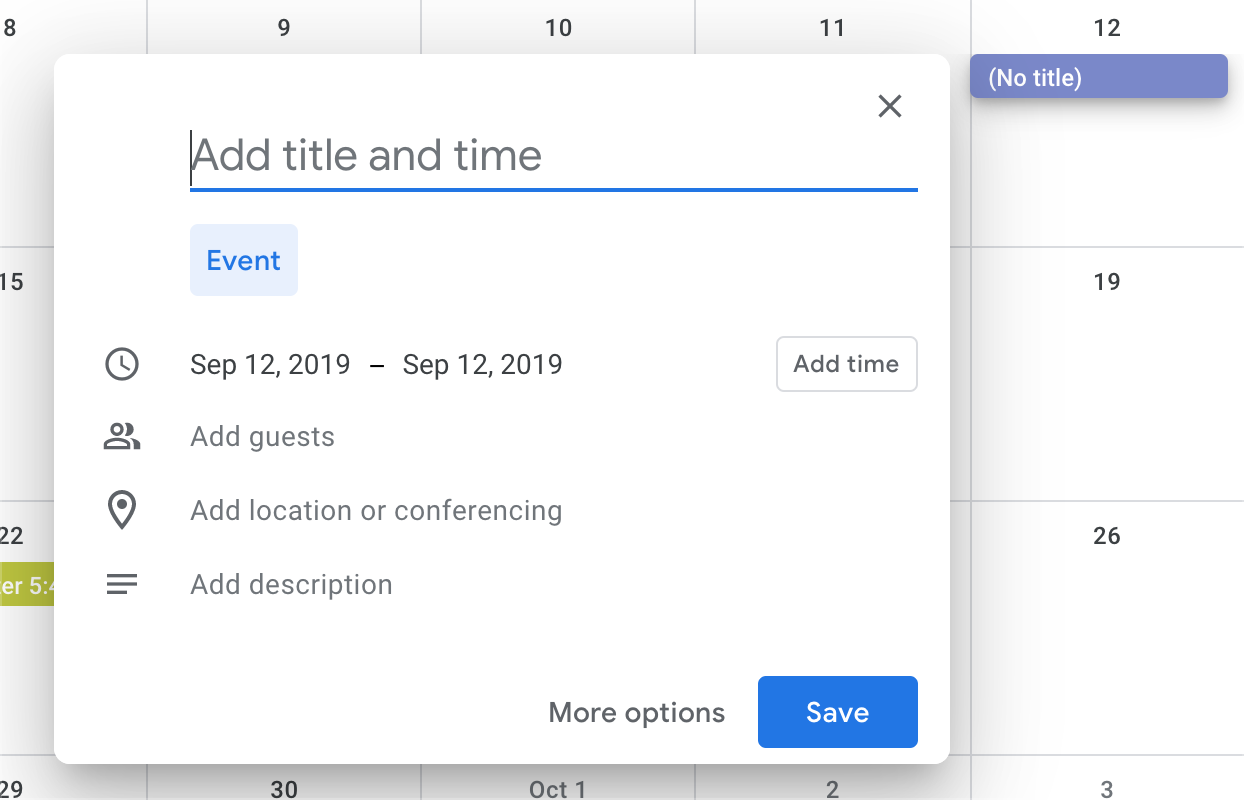
Type in your title (this is what you will see on your calendar), change up the time, add guests, locations and create a description. This automatically creates an all-day event. So, remember that Google still doesn’t know how to prioritize all-day events if you create more than one! Hit save when you’re done.
If you want to go into more details about your event, hit more options and it will take you here:
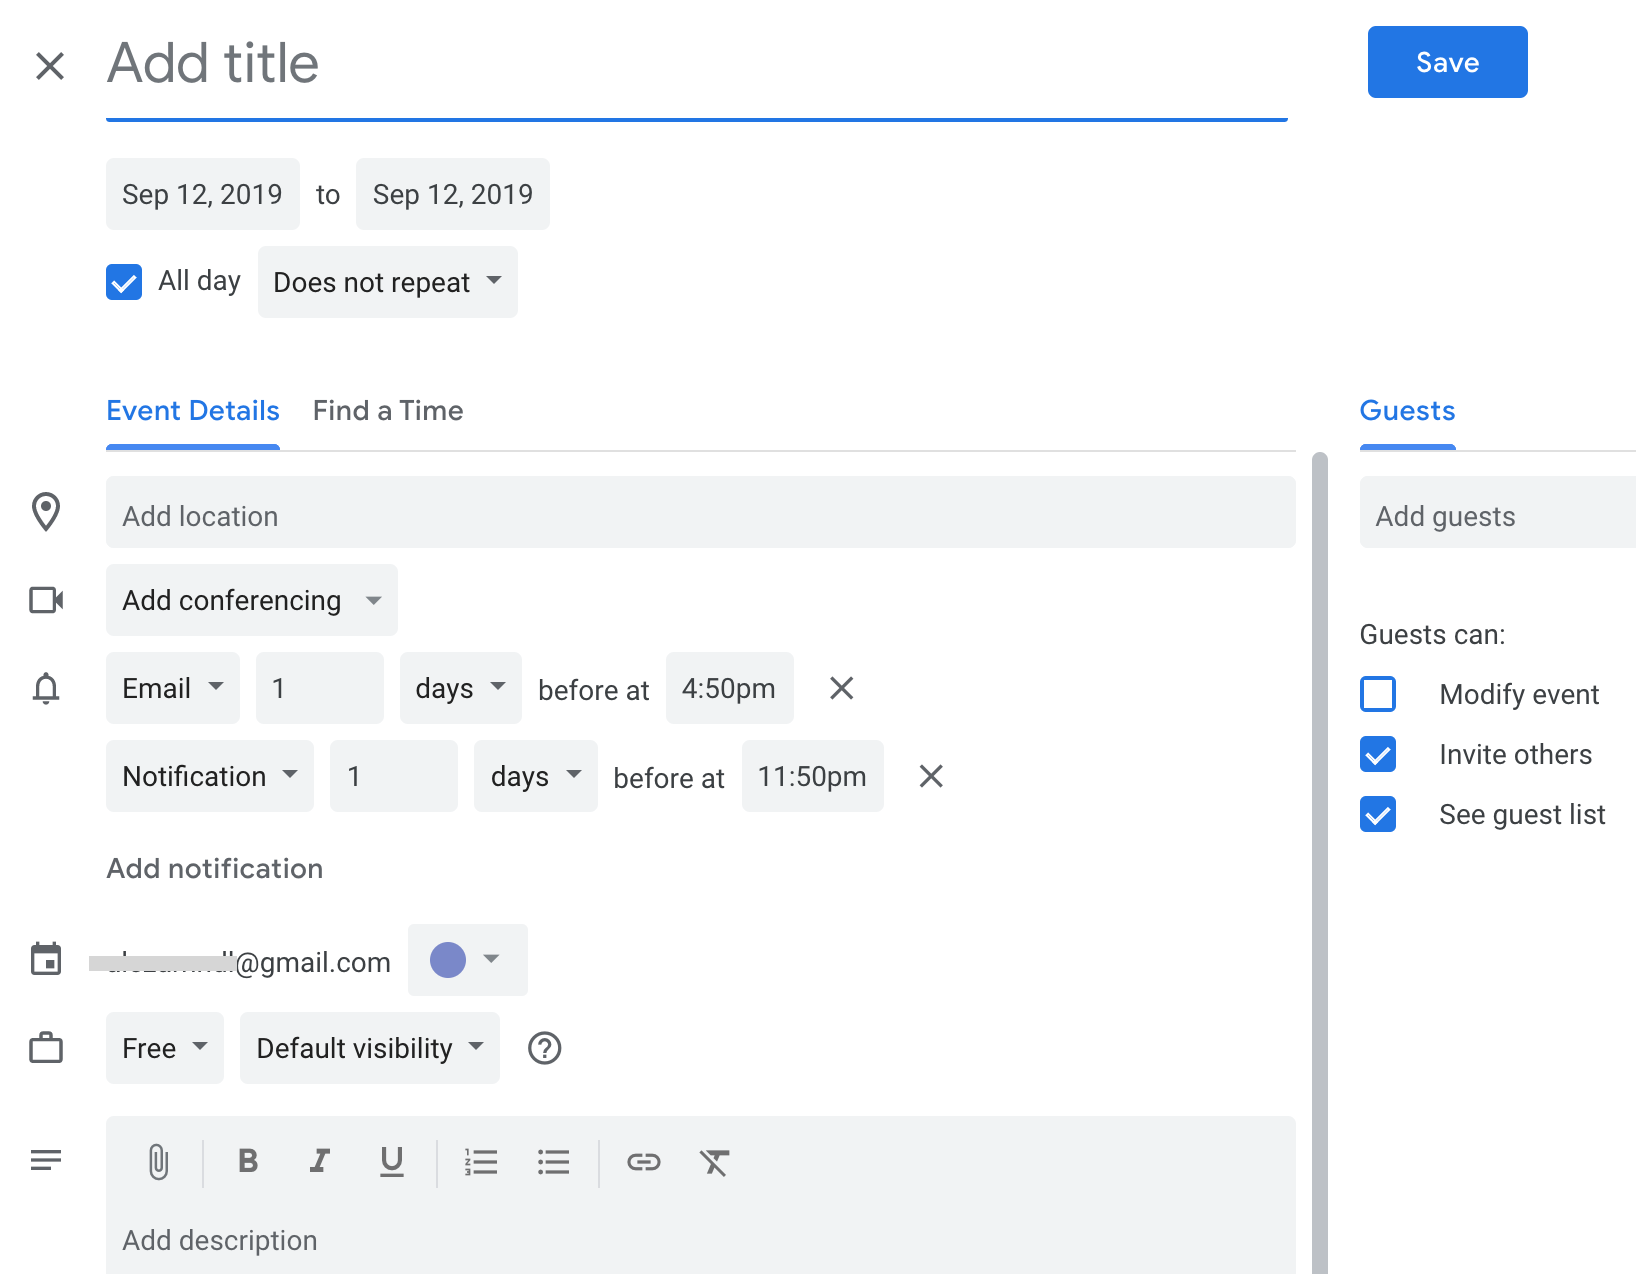
Make sure you’re in event details first, these are where you can edit everything.
Here you can adjust all the components you had on the mini form and more. This includes making the event last all or recurring. When you hit does not repeat there will be several ways to repeat your event so you don’t have to change it later on. Events can repeat daily, weekly, monthly, yearly, every weekend or weekday, whatever you want!
Start to type in the location you want and Google will find it for you. Click on Add conferencing to add a call through Google Hangouts.
Click on notifications and you can choose which type of notification you want to get. You can choose to get notifications by email or by a notification on your browser or phone. This is also where you can choose when you want to be notified before your event whether it’s as early as a week before, days, hours or minutes.
Under notifications you can easily change the color since most events will automatically match the color of your entire calendar, it can be nice to see a different color so it doesn’t all blend together.
The little icon with the briefcase lets you alter the privacy of that event.
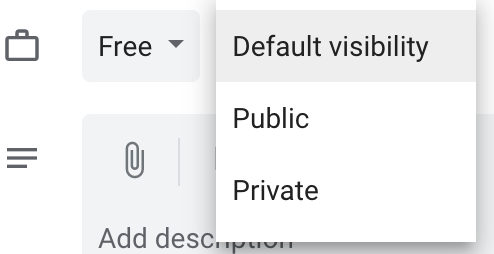
Automatically, your event will be set to default visibility, which is anyone you’ve already shared your calendar with can see all the details for that event, even if you change it to public as well. Click on private and the people who can normally see your calendar won’t be able to see the details of that specific event. They will see it listed as busy or available depending on which setting you decide on.
Lastly, the description is where you can add some extra detail to your liking and you can also add attachments that you want people to have prior to your event.
Adding Events From Your Phone
If you want to have more text, it will be easier to add events from your computer. But, if you’re looking to quickly add an event, your phone is the way to go.
You will see a colorful plus button at the bottom of your screen that looks like this:
You can click on the plus and a screen will pop up giving you options of what you want to add to your calendar.
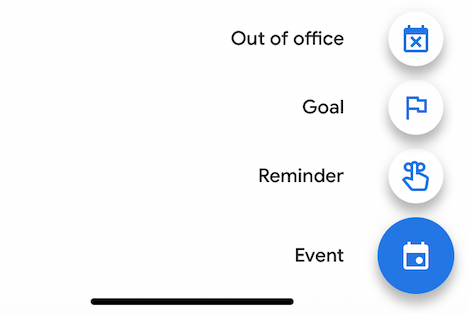
Click on whatever option you like and it will bring up the specific form. Here you can choose to show when you’re out of office, set a goal, reminder or create an event. Note: if you want to add attachments, this can only be done from Google Drive!
Setting Goals
Since you can only do this on your phone, hit that pretty plus button again at the bottom of your calendar view and select Goal and Google will bring up a bunch of options for you to choose from. Check it out!
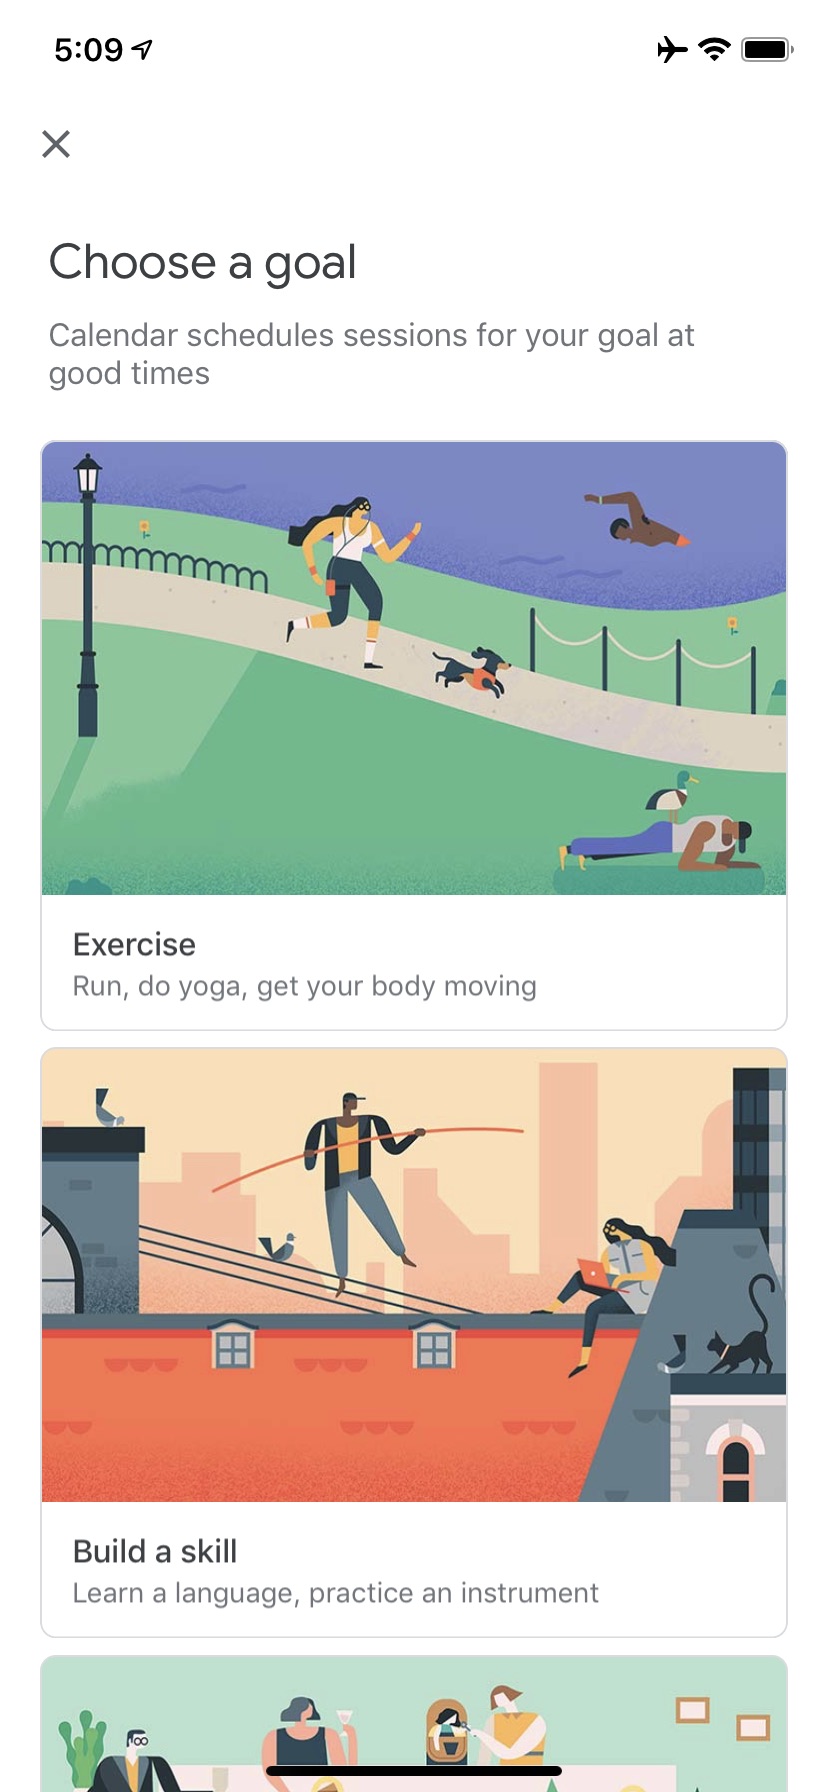
Pick one of these and you can make the goal anything you want it to be. Learn something new, workout a little more, organize your days, whatever you want! Let your mind run free.
Once you choose one, Google will ask you if you want to work on your goal in the morning, afternoon, evening or a specific time you choose. Google knows things come up, so if you don’t have time to work on your goal, no worries! Google will reschedule it for you.
Adding Events From Gmail
Remember that this is a handy tool to have. Just make sure it’s turned on in your settings as we mentioned earlier. Keep in mind that when Gmail adds your events, they will automatically set to private, even if you’ve already shared your calendar. To change this, head to your friend the settings icon where you can change the visibility next to Events from Gmail.
Adding Events From Google
Another trick for you!
Go to your good-ole Google search bar and type in, “Schedule meeting for next Friday at 2pm.” Just like that, click create event and it will be added your calendar straight from there as long as you’re logged in.
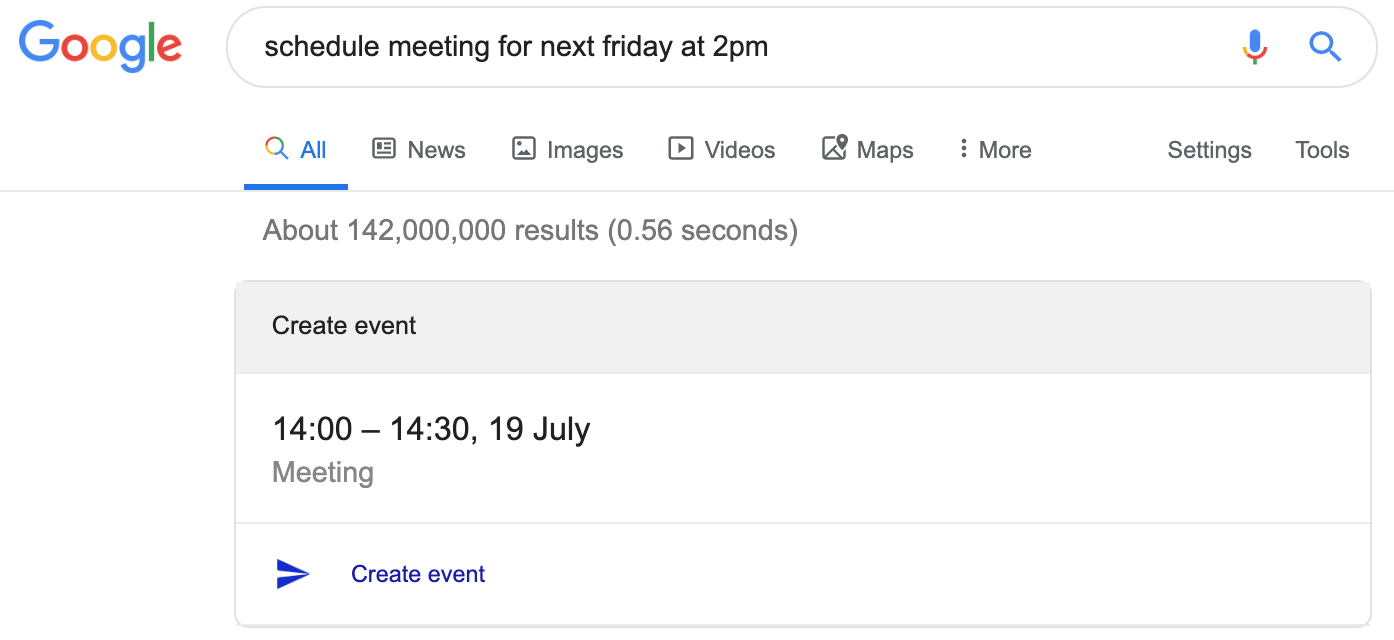
You can play around with how you phrase the search with “schedule” and “book,” but you should mention the time and day so the details are set up once you add it to your calendar.
Adding Events From Google Assistant
Don’t feel like typing today? Use your voice with Google Assistant!
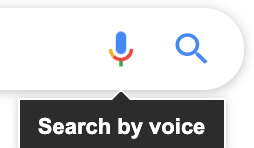
Just say what you want to schedule and the same form will appear beneath your search bar where you can add your event.
Adding Events A Key
Press Q to see the mini-event form when you want to add an event for the current day. Super fast and super easy!
Calendar Views (Daily, Weekly, Monthly, Yearly & Agenda)
Yes, you can view your calendar in different ways. Let’s check them out! On your computer, the calendar monthly view will look like this:
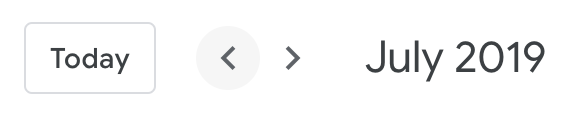
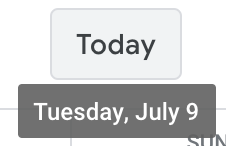
Those arrows are what’s going to move you forward or backward throughout the year by month. Hover your mouse over Today and the current date will pop up underneath:
Next to your friend, the settings icon, is where you can change the view of your calendar.
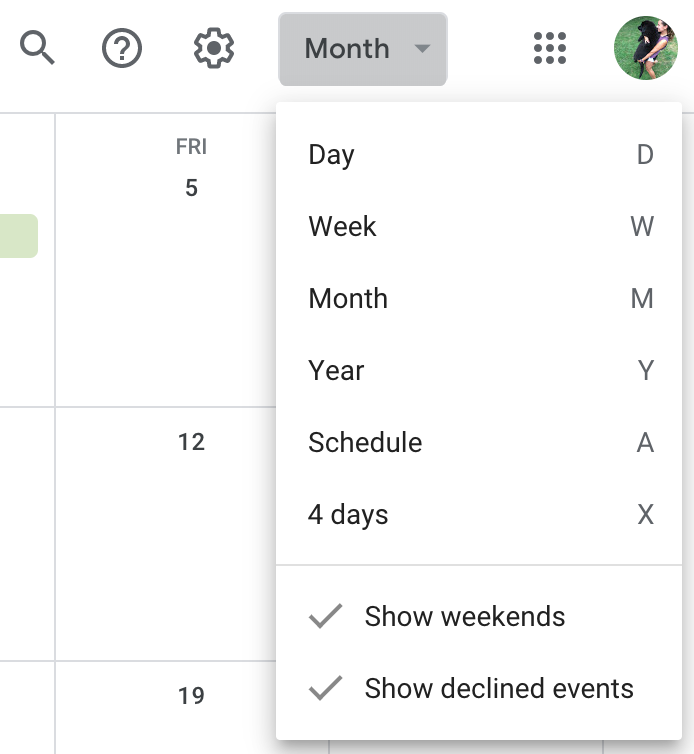
Here you can change your view to any of these options and your schedule will only show the list of events you’ve placed in your calendar.
Changing Calendar Views With Sidebar
More tricks are coming your way. On your desktop, there will always be a mini monthly view on the left side of your screen.
It’s even easier than using the drop-down menu! Whatever you highlight will show up as a larger view.
Want to just see your calendar without the entire sidebar? Easy.

Just click on this little guy at the top left-hand side of your screen and it will all disappear! Want the sidebar to come back? Click it again and it appears. Just like magic.
On your phone, clicking that icon does something entirely different, like this:
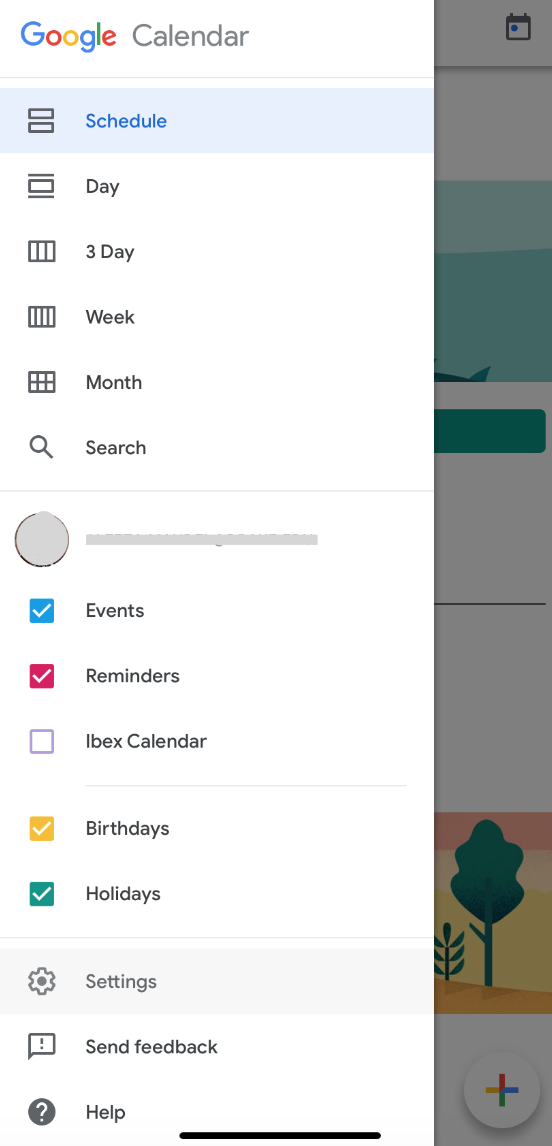
Look familiar? Hitting that icon with the three lines shows you all the different kind of views you can see on your phone.
Who says you have to always click the icon, though? Remember those keyboard shortcuts we talked about? Now is your time to use them!
No WiFi? No Problem
Here’s another fun fact: your calendar will still work on your phone without WiFi! You can still add events, set goals, whatever you like. Once you have a connection again, everything will sync and update to your online calendar.
You can’t do this on your computer. You can try, but you won’t see any results until you are back online. It’s better to use the app if you are offline!
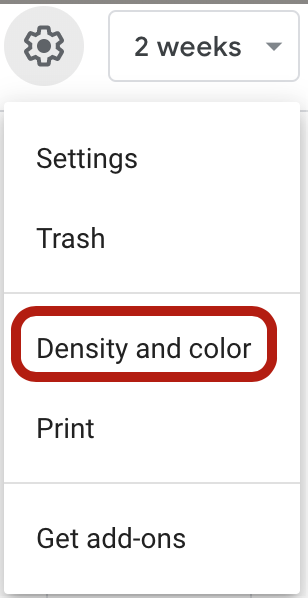
Change Up Your Look
Don’t forget you can change up your look…a little. Head to your friend the settings icon. Click on Density and color.
Although Google only gives you two options, it’s better than nothing. Here are your options:
Choose Modern (white text) to make the text on a colored event background appear white.
Choose Classic to set your text to black.
So, you can change those but everything else on your calendar will stay exactly the same. Your other two options when you click on density and color lets you alter the information density. You have two options for this as well.
Choosing the Responsive option won’t squeeze everything into your calendar view. It will add a link if you have more than four or five items in a day. You click on the link to see all of the events for that day.
Choosing Compact will squeeze more items into the same space. Then, you can see everything for that day all at once.
Google Calendar 2019 Video Tutorial
Extras
G Suite
Just when you thought Google Calendar couldn’t get more complex, G Suite shows up. Google is smart and sells various services to businesses, which also includes the calendar.
Companies have the option to pay between $5 – $25 per user per month to get more than just the free stuff. They can also get a lot more space for storage and have data loss prevention for Gmail and Google Drive. They even get to use it with no ads. Who knew there was such a thing?
Wrap Up
Bet you didn’t think Google Calendar could do so much. Well, now you’re an expert at working Google Calendar, for now. As we all know, there is always something more to come. Say your heartfelt goodbyes to your paper planner.
What are you waiting for? It’s time to get organized everywhere you go, at any time, with everyone.